Hello crafty friends!
Today it’s finally time for another #ChallengeACraftyFriend! This challenges theme: Case one of your own cards and turn it into a box card! Boy, this was harder than I thought it was going to be! But I had lots of fun on this challenge! I used my recently posted Magic Picture Changer birthday card as the basis for my box. As before, I made a birthday scene using the “Birthday Before and Afters” and “Butterfly Kisses” stamp sets by Lawn Fawn.
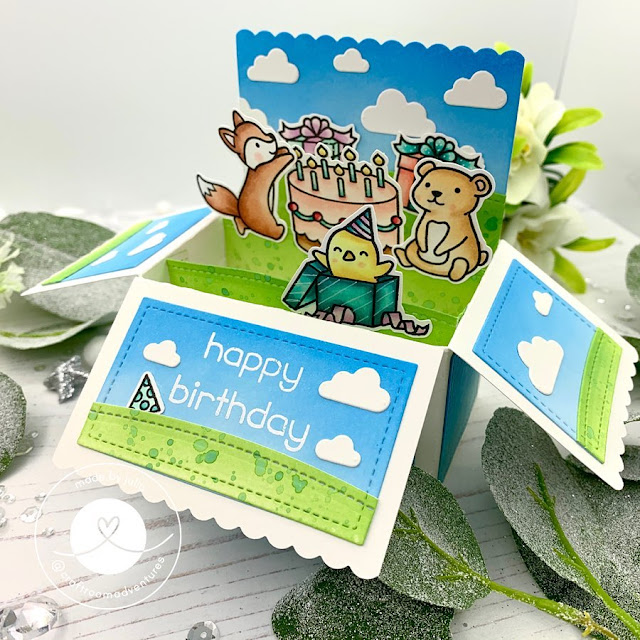
First, I stamped all my images onto Neenah cardstock and colored them in using Copic markers. I added some white gel pen embellishments and lots of shimmer pen to the cake and the gift boxes. Then, all the images were cut out using the Brother Scan’n’Cut.
I die cut the basic Scalloped Box Card pieces twice out of white cardstock. I then die cut the pieces for the decorative flaps and also an additional background piece out of bristol smooth cardstock. I ink blended them using Tumbled Glass and Salty Ocean Distress Oxide. After that, I die cut the two inside hills, one additional hill for the back and some small hills or the decorative flaps and used Twisted Citron and Mowed Lawn Oxide Inks to ink blend those. I also added some green splatters to it using the same colors on all of them.
I also die cut lots of little white clouds with dies that come with the Center Picture Window Card die set.
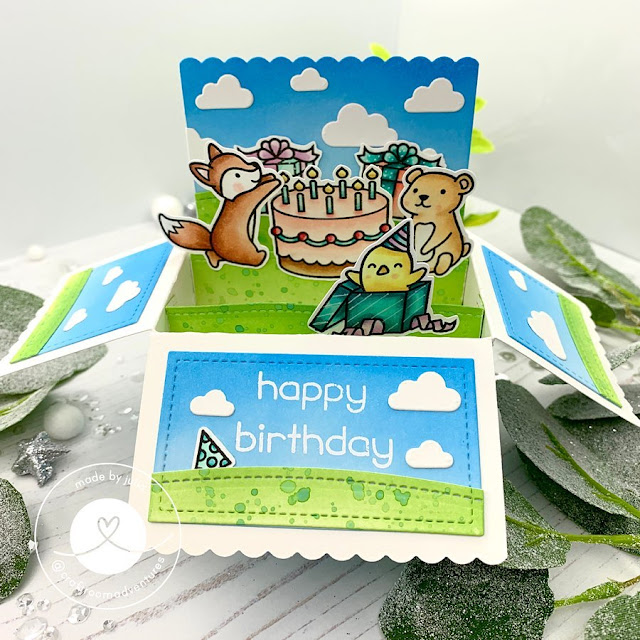
Then it was time to assemble the card. I reinforced all of the score lines that the die created and I added Scor tape to the flaps of the box pieces and to the sides of the inside hills. I lined up the box pieces right next to each other, removed the backing paper and adhered the two pieces together. Then, the hills were added to the right short side of the inside of the box right up at the edge. I flipped over the hills, removed the backing paper and closed the left short side onto the exposed adhesive. Now all that was left to do was remove the backing paper on the second box flap and close the card onto itself to create the box!
I adhered the hills and clouds to the background and decorative pieces using liquid glue and heat embossed the sentiment in white onto the front flap piece. Then all the images were adhered to he inside of the box using liquid glue. And that finishes my card for today!
I hope you enjoyed it and until next time!
Thank you for stopping by and have a great day!
– Julia
Products used / Produktliste:
Strathmore Bristol Smooth Cardstock
Neenah – Solar White 80lb
Crafters Companion – Gemini Junior
Brother – Scan’n’Cut CM300
Lawn Fawn – Birthday Before’n’Afters
Lawn Fawn – Butterfly Kisses
Lawn Fawn – Scalloped Box Card
Lawn Fawn – Center Picture Window
Gina K – Amalgam Ink Black
Versamark
WOW Embossing Powder – Opaque Bright White Super Fine
Distress Oxide Ink – Tumbled Glass, Salty Ocean, Twisted Citron, Mowed Lawn
Copic Markers – Colors can be seen in the video
Jelly Roll – White Pen
Nuvo – Aqua Shimmer Pen
Nuvo – Deluxe Adhesive
Scor Tape
Leave a Reply