Hello crafty friends!
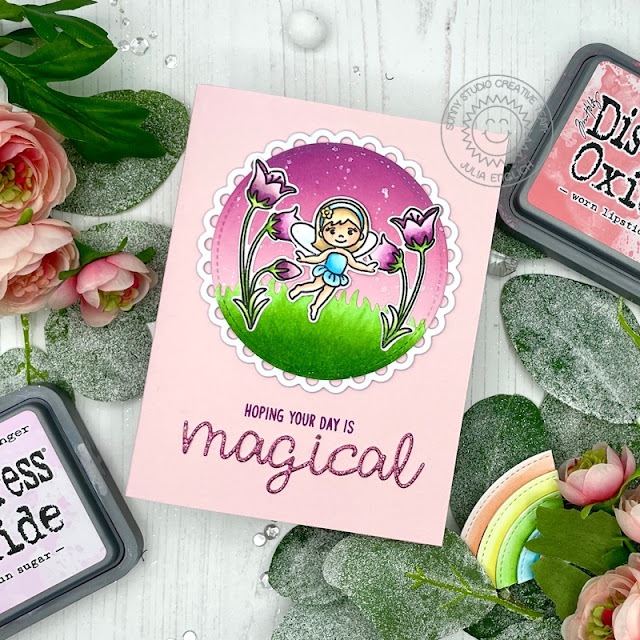
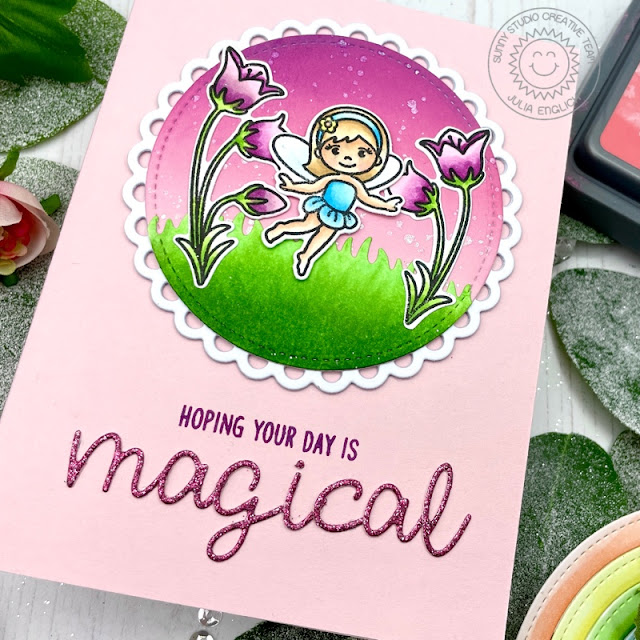
Today I want to share my very first card as a design team member for Sunny Studio stamps with you. I just couldn’t be more excited! So I really hope you like it! For this one I created an inside tunnel card using the Stitched Circles dies and the Fairy Garden stamp set!
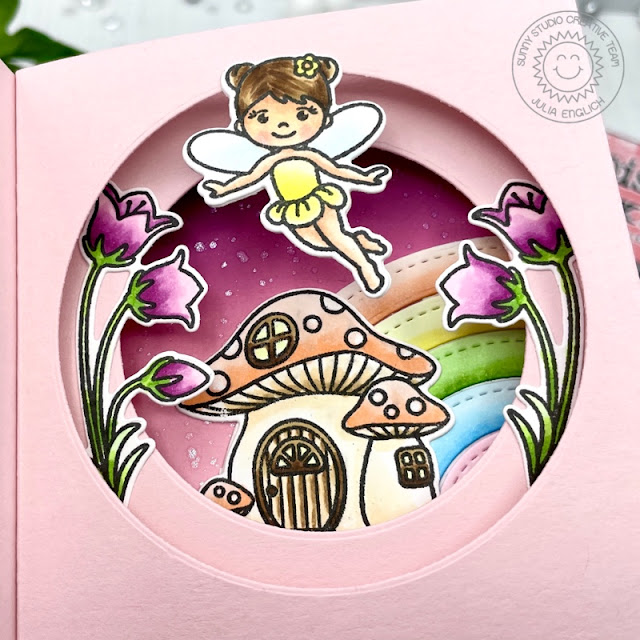
First, I stamped my images onto Neenah 80 lb cardstock and colored them using Copic markers. Then I cut a piece of 8 1/2 x 11″ light pink cardstock in half. One panel I cut down to 8″x 5 1/2″ and scored it at 4 1/4″. The second one I left as is and scored it at 1/2″, 4 1/4″ and 4 3/4″. I used the largest of the Stitched Circles – Small to cut the opening between the 1/2″ and 4 1/4″ score line. The circle cut out that remained I used for the front of the card. After that I used an A2 sized panel of light pink cardstock for the inside of the tunnel mechanism. I cut a slither off of the top and one side and scored it at 1/4″ from either side. I lined up the first panel with the circle cut out with the inside piece, lined it up and used the next size down of the Stitched Circles – Small to create the tunnel effect.
I ink blended on the inside of the second panel and the circle cut out directly onto the colored cardstock using Spun Sugar, Worn Lipstick and Seedless Preserves Distress Oxides and added splatters with Liquid Stardust.
After that I added score tape to the back of the ink blended piece, the 1/2″ flap and the 1/4″ flaps of the inside pieces and attached them to the card base (first panel). In the video (linked above) you can see exactly how I attached everything! It’s super hard to describe all the steps but super easy to show you! 😉
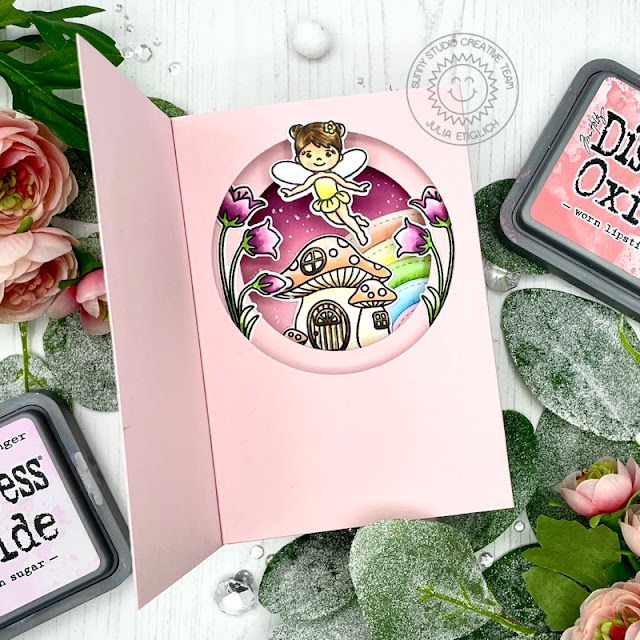
I die cut the Scalloped Circle Mats 3 three times out of white cardstock and layered them using liquid glue. I then die cut a grassy panel and used the circle die again to give it the same edge as my ink blended circle. After that I lined up the circle dies and ran them through my die-cutting machine. I cut them in half to create a rainbow. I colored the grass and the rainbow pieces with the same marker colors I used on the other images (see color map below).
Then I added the scalloped circle with the stitched circle and the grassy border to the front and stamped my sentiment. I die cut the word magical with the Loopy Letters dies and added that to the panel with liquid glue.
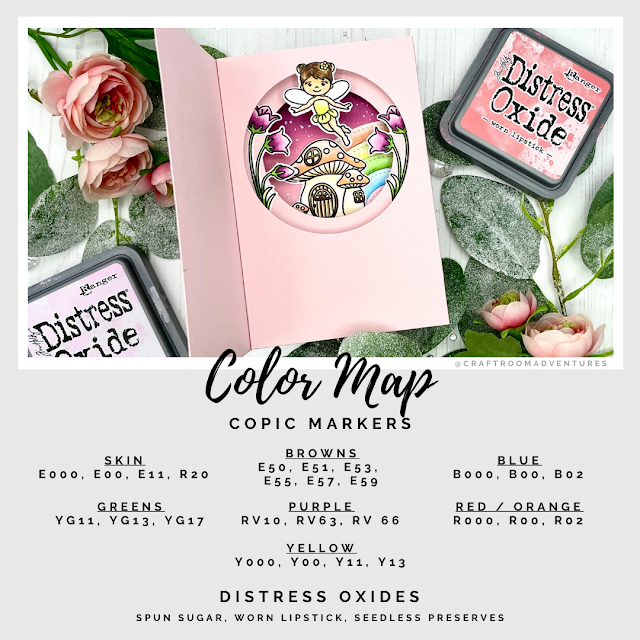
Finally, I attached all of my images and used lots of shimmer pen to embellish my card!
I really hope you like this one and I hope to see you again soon!
Thank you for stopping by and have a great day!
– Julia
Products used / Produktliste:
Strathmore Bristol Smooth Cardstock
Neenah – Solar White 80lb
Crafters Companion – Gemini Junior
Sunny Studio Stamps – Garden Fairy stamps and dies
Sunny Studio Stamps – Stitched Circles Small
Sunny Studio Stamps – Scalloped Circle Mats 3
Sunny Studio Stamps – Slimline Nature Borders
Sunny Studio Stamps – Loopy Letters
Gina K – Amalgam Ink Black
Distress Oxide Ink – see color map above
Copic Markers – see Color Map above
Nuvo – Shimmer Pen
Lawn Fawn – Liquid Stardust
*Disclaimer/ Hinweis: AD / Werbung als Design Team Mitglied von Sunny Studio Stamps.*
Leave a Reply