Hello crafty friends!
It was father’s day a little while back here in Germany and I made this fun scene card using stamps and dies by Lawn Fawn! When is father’s day where you are? I only realized that it varies quite a lot all over the world!
I also have super exciting news to share with you! I am so happy to announce that I am joining the design team for my favorite German craft shop, Monis’s Bastelkiste. Moni offers all kinds of amazing craft supplies, including Lawn Fawn of course, and she ships worldwide as well!! So I hope you’ll check her out and also stop by to say hi to my incredible fellow teamies Junonic, Mine_kreativ, and Stempellini!!
For this card, I was totally inspired by the incredible Megan from the Lawn Fawn Design Team because she keeps making these amazing “Polaroid-style” cards with a square scene and a greeting below or above using alphabet dies, so I just had to try it myself!!
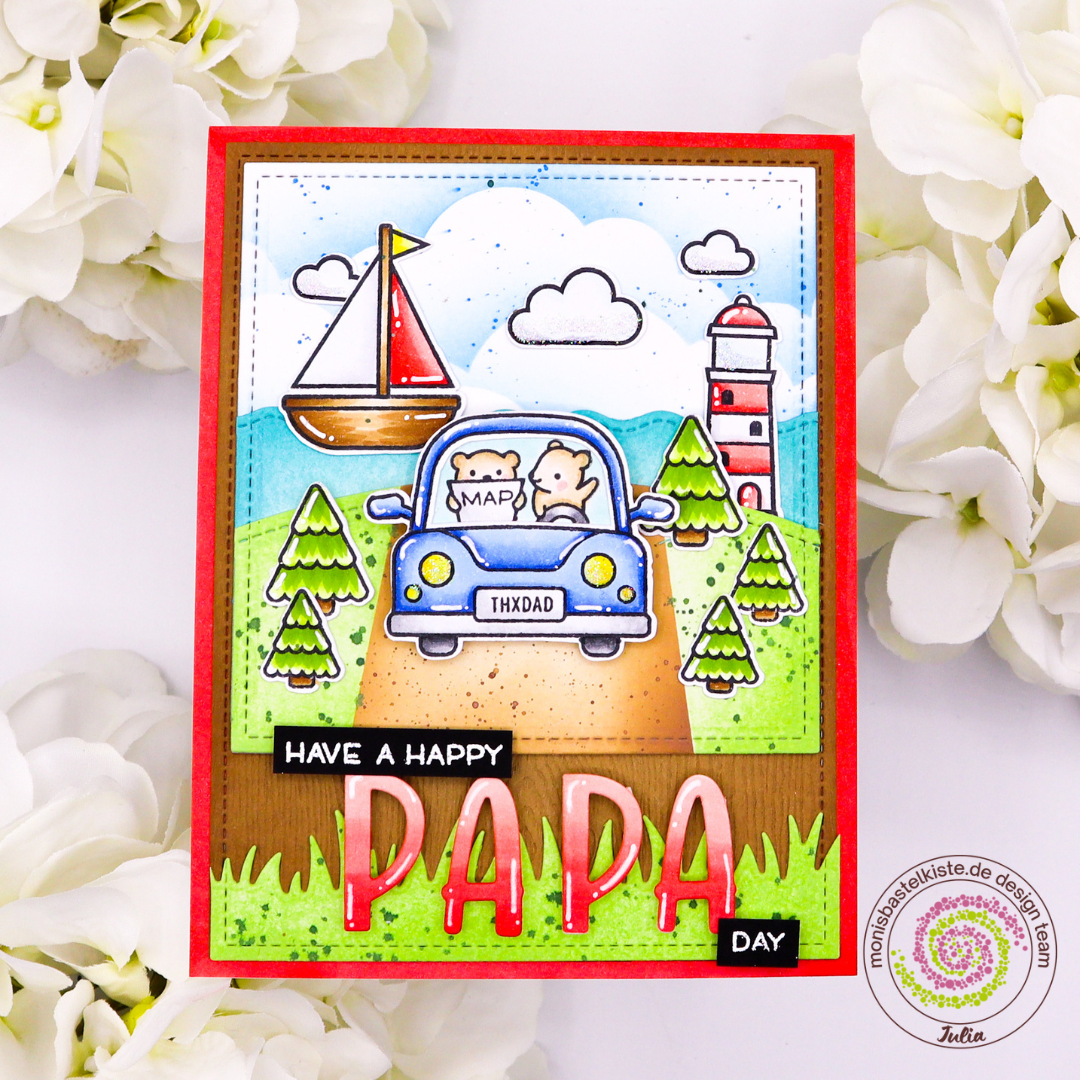
As always, I started by stamping the images from Smooth Sailing, Car Critters as well as the trees from Yeti or Not onto marker paper and cut them out using my Brother Scan’n’Cut DX. Afterward, I colored them in using Copic markers (colors listed below). Then, I die cut the pieces for my little scene using the Grassy Border, Simple Stitched Hillside Borders, Simple Wavy Borders and the Small and Outside-In Stitched Rectangles. I didn’t have any stitched square dies that fit, so I just used the rectangles and cut the pieces to form an even 4″ square.
I also die-cut the letters for “papa” (cause that is what I call my dad!) from Henry’s ABCs and I colored them using the same red combination I used for the sail of the boat. I also heat embossed the other parts of the sentiment in white onto black cardstock and then it was already time to assemble my scene.
I colored the edge of my white card base using the same red markers as before to make sure it all matches nicely and then layered a piece of brown woodgrain cardstock cut slightly smaller on top. Then, I added my cloudy square, the waves, hills, and grass on top. For the letters, I laid one layer of fun foam behind the colored letters for extra dimension and added the car and the rest of the sentiment using foam squares. As a finishing touch, I added Crystal Glaze on top of the car’s headlights!
I hope you liked this one! You can watch the full tutorial down below:
I had a really good time making it and I hope I will see you again next time!
Wishing you a wonderful day!
crafty hugs,

Products used:
Lawn Fawn Car Critters
Lawn Fawn Smooth Sailing
Lawn Fawn Yeti or Not
Lawn Fawn Henry’s ABCs
Lawn Fawn Simple Stitched Hillside Borders
Lawn Fawn Grassy Border
Lawn Fawn Simple Wavy Borders
Lawn Fawn Small Stitched Rectangle Stackables
Lawn Fawn Outside-In Stitched Rectangle Stackables
Lawn Fawn Woodgrain Cardstock
Distress Oxide Inks in Tea Dye, Vintage Photo, and Salty Ocean
Lawn Fawn Inks in Celery Stick, Noble Fir, Mermaid, and Peacock
Copic Markers in E50, E51, E53, E55, E57; YG00, YG01, YG03, YG06, YG67; BG0000; Y11, Y13, Y15; R20, R21, R22, R24; B21, B23, B26; N0, N1, N3, N5, N7.
Sakura Gelly Roll in white 10
WOW Embossing Powder Opaque Bright White Superfine
Nuvo Crystal Glaze
DISCLAIMER / HINWEIS: AD / Werbung als Design Team Mitglied für Monisbastelkiste.de
Leave a Reply