Hello crafty friends!
How are you today? This time I am back with a fun interactive card for Moni’s Bastelkiste!! Ever since I saw the Beary Rainy Day stamp set I just knew I had to use it with a magical rain shaker, but life just got in the way. So now finally, I had time to make it and I had the best time with it, too!!
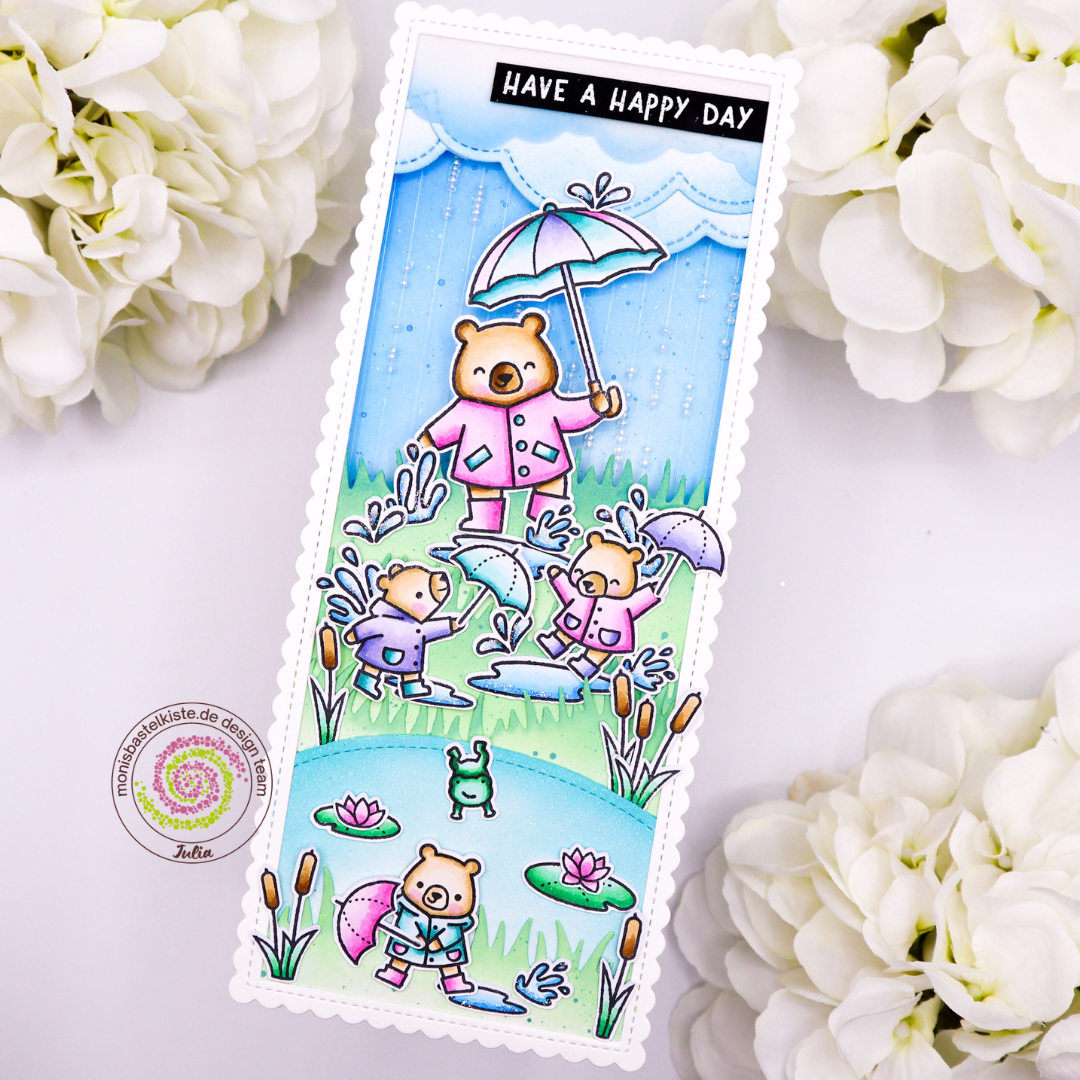
I stamped the images on marker paper and cut them out using my Brother Scan’n’Cut DX. Then, I colored them using Copic markers. Once I finished coloring, I die-cut the slimline scalloped background panel and used a smaller slimline die to cut the opening so that I would just have the white scalloped frame. I also die-cut several cloud and grass hills as well as a pond. I ink blended the background and the hills and glued them to the back of the scalloped frame. Then it was time to create my rain shaker mechanism. All you need to make it is nylon string (I used the thinnest I could find), small beads and foam tape! I used a ruler to add pencil marks to the top and bottom of my mechanism every 1/4″. Then I added foam tape on both ends and I strung up lots of beads on my clear string. Then all you need to do is pull the string with a few beads taught and press the string into the adhesive on either side using the pencil marks as a guide. Snip off the end of the string and repeat all across the panel. Then add a second layer of foam tape making sure to really press the strings into the adhesive. I show how to create it in detail in the video, so please check that out if you want to see how it comes together!
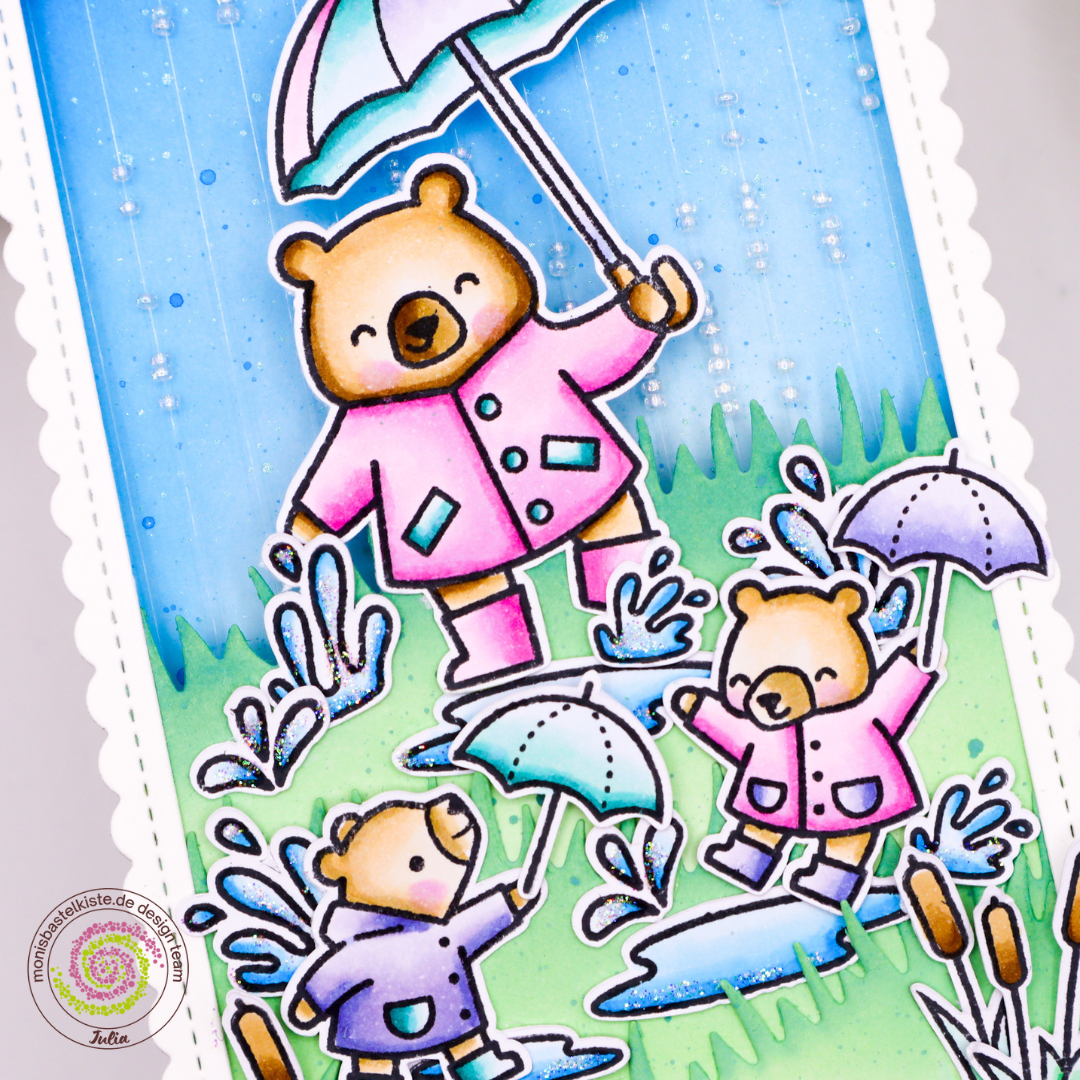
I used foam tape to add the background with the mechanism to the frame. Then, it was already time to add all my adorable images. I adhered them all using liquid glue since the two layers of foam for the mechanism were already pretty chunky and I didn’t want to add any more bulk to the card.
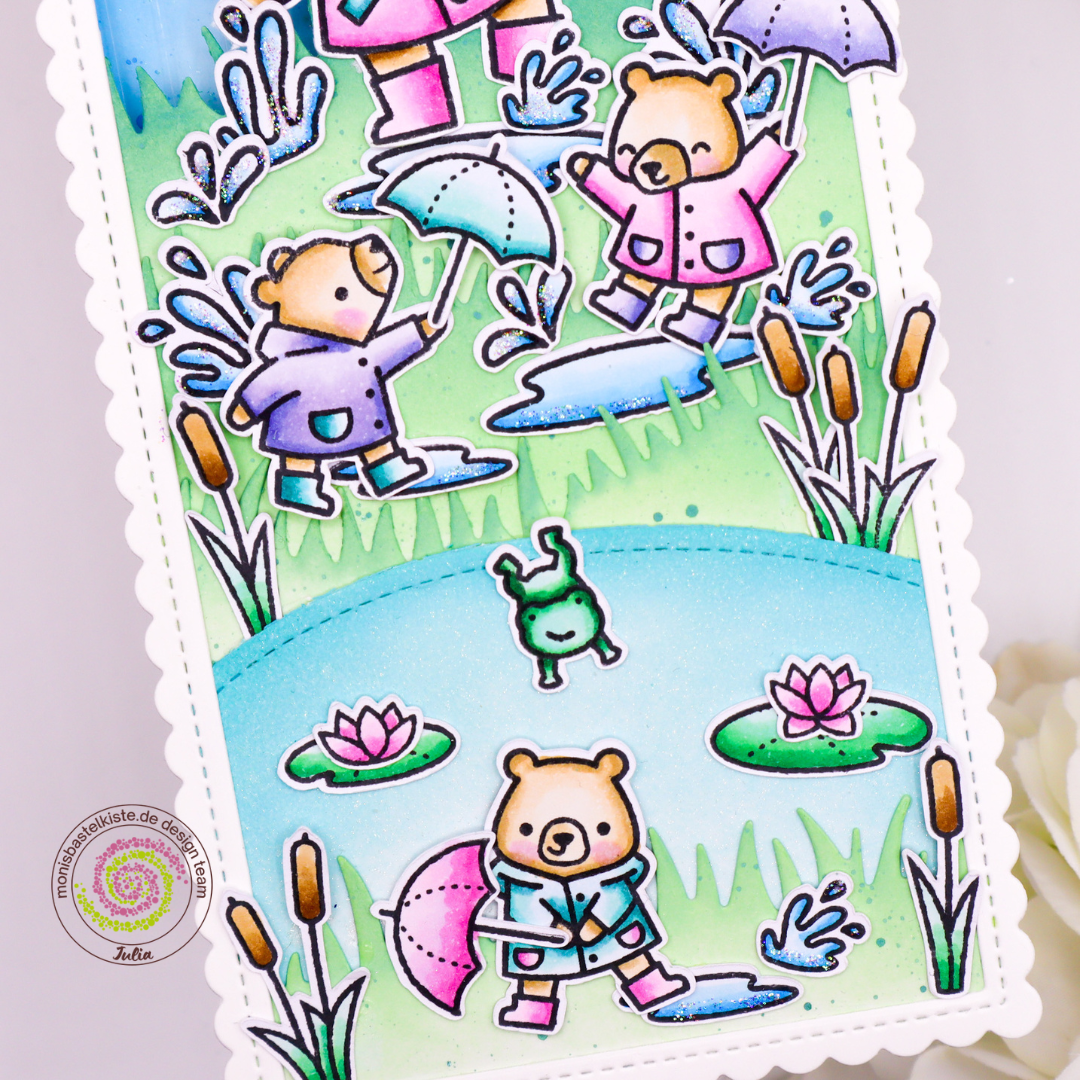
I heat embossed the sentiment in white onto black cardstock and glued that down flat as well. Then, I added a bit of Stardust Stickles on all the water images as well! I had so much fun making this one, and I hope you like it!
You can watch the full tutorial down below:
Wishing you a wonderful day – until next time!
crafty hugs,

Products used:
Lawn Fawn Beary Rainy Day
Lawn Fawn Here for You Bear
Lawn Fawn Swan Soiree
Lawn Fawn Simple Grassy Border
Lawn Fawn Grassy Hillside Borders
Lawn Fawn Stitched Cloud Borders
Lawn Fawn Stitched Pond
Lawn Fawn Scallop Slimline with Hearts: Portrait
Distress Oxide Inks Tumbled Glass, Salty Ocean, Salvaged Patina, Peacock Feathers, Cracked Pistachio, Evergreen Bough.
Copic Markers – E50, E51, E53, E55, E57; RV10, RV52, RV55; BG0000, BG11, BG13, BG17; BV0000, BV00, BV01, BV02, BV04; G00, G01, G03, G17; B0000, B00, B02, B05.
Stickles in Stardust
DISCLAIMER / HINWEIS: AD / Werbung als Design Team Mitglied für Monisbastelkiste.de
Leave a Reply