Hello there!
I hope you are doing well! For this post, I made a fun bee-themed interactive magic iris birthday card!
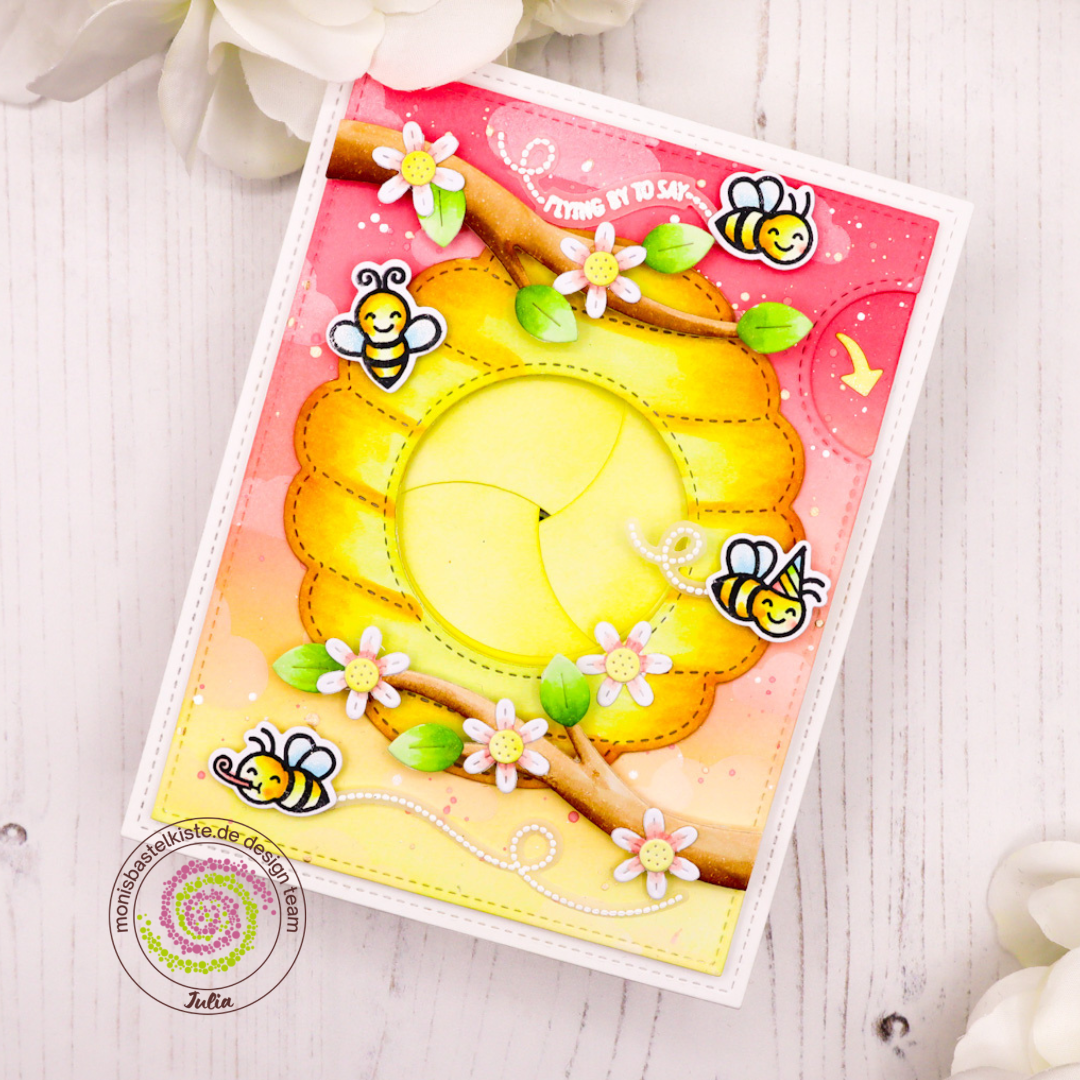
I stamped the images on marker paper and cut them out using my Brother Scan’n’Cut. Then, I colored them using Copic markers. Once I finished coloring, I die-cut tall the pieces for the Magic Iris as well as the Add-On and the Beehive add-on panel out of white card stock. I ink-blended the background and added shimmer splatters on top, and then I colored in the beehive and branches with Copics as well. I did cut the honeycomb and adhered it to the background panel. To add lots of sparkle, I filled the openings with crystal glaze and sprinkled prisma glitter overtop. Once dried, I brushed away the excess glitter, and it left the honeycomb looking super sparkly and dimensional!
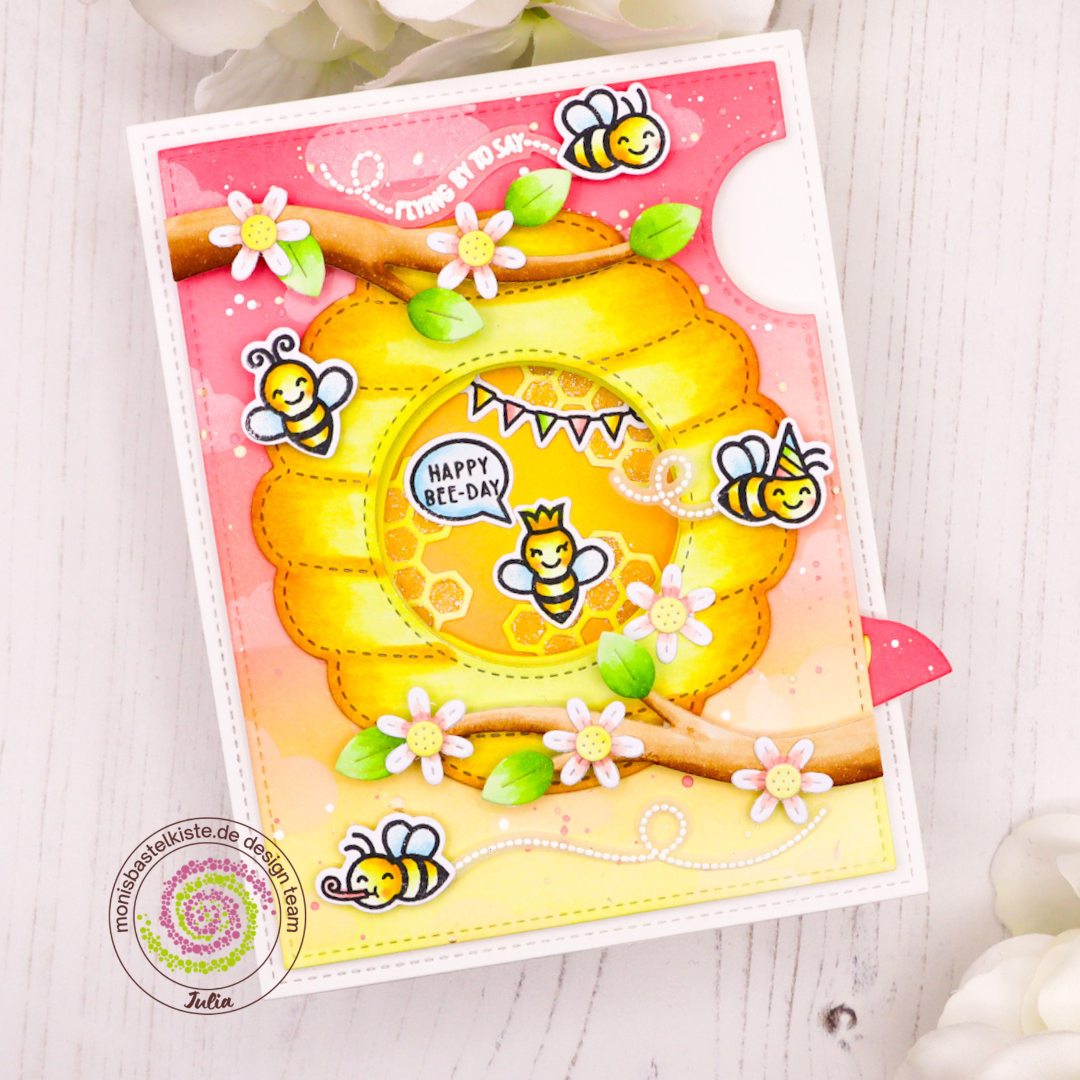
Then it was already time to assemble my card! I put together the magic iris (I show exactly how to do it in the video below!), added the card front and adhered both to an A2 sized card base. I added the beehive as well as the branches and blooms on top now it was finally time to add in all my cute bees and decorate the inside of the iris. As a finishing touch, I added shimmer pen to the wings of the bees.
You can watch the full tutorial down below:
I really hope you enjoyed this one and I hope you have a wonderful day – until next time!
crafty hugs,

Products used:
Lawn Fawn Hive Five
Lawn Fawn Just Plane Awesome Add-On
Lawn Fawn Magic Iris
Lawn Fawn Magic Iris Add-On
Lawn Fawn Magic Iris Beehive Add-On
Lawn Fawn Cloud background Stencil
Lawn Fawn Yeti Ink
Lawn Fawn Vellum
Lawn Fawn White Embossing Powder
Distress Oxide Inks in Squeezed Lemonade, Dried Marigold, Saltwater Taffy, Worn Lipstick
Copic Markers in Y000, Y11, Y13, Y15, Y17, YR24; BG0000, BG000, BG01, BG02; YG11, YG13, YG17; R20, R22.
Nuvo Crystal Glaze
Lawn Fawn Prisma Glitter
Lawn Fawn Glue Tube
Mini Glue Dots
DISCLAIMER / HINWEIS: AD / Werbung als Design Team Mitglied für Monisbastelkiste.de
Leave a Reply